A Project for the Do It Your Selfer - Tilt-out Cabinet Trashcan

Image

It’s Saturday go to your nearest crafting store, and see the creations of locals such as the community sidewalk sale at Roadrunner Emporium and New York Avenue Saturday 10 to 4. The let your imagination begin for your own project such as…

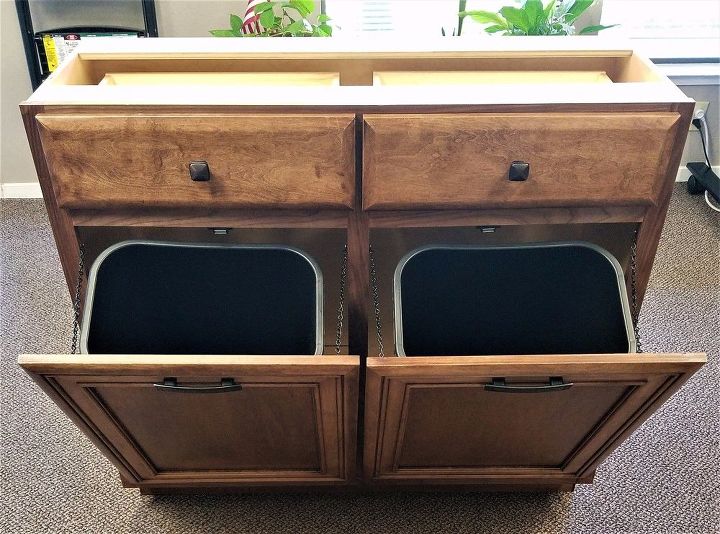
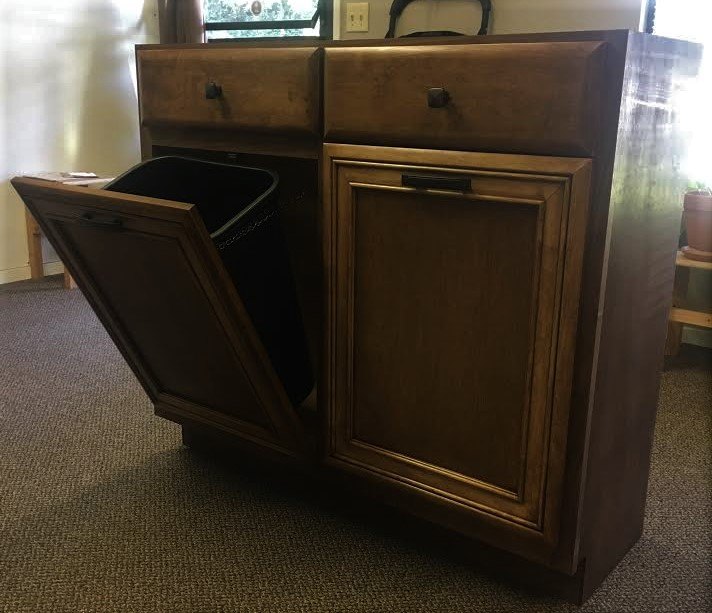
Looking to hide your unsightly trash bins? Why not do so by blending them perfectly to the rest of your custom-built cabinets in your kitchen. 

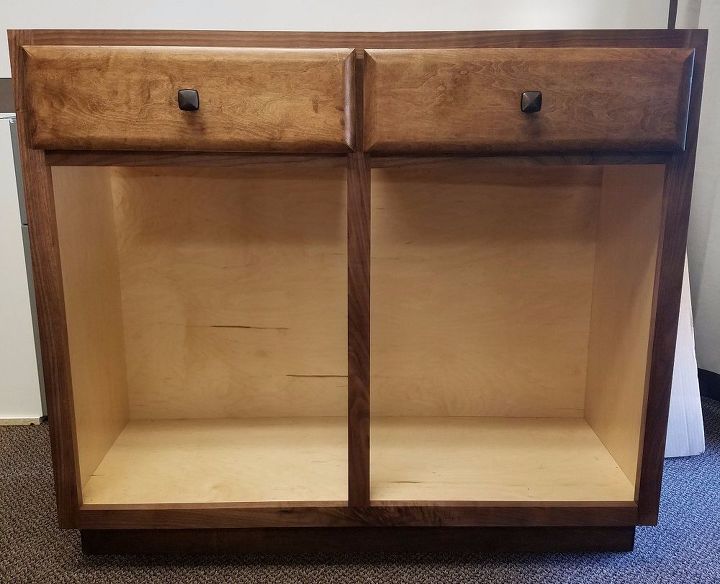
For this project, we recommend using a double bowl vanity which can be purchased from CabinetNow.com along with the custom made doors, drawer fronts, and drawer boxes.
Let’s start this handy project by making sure that you have all the required materials to begin.
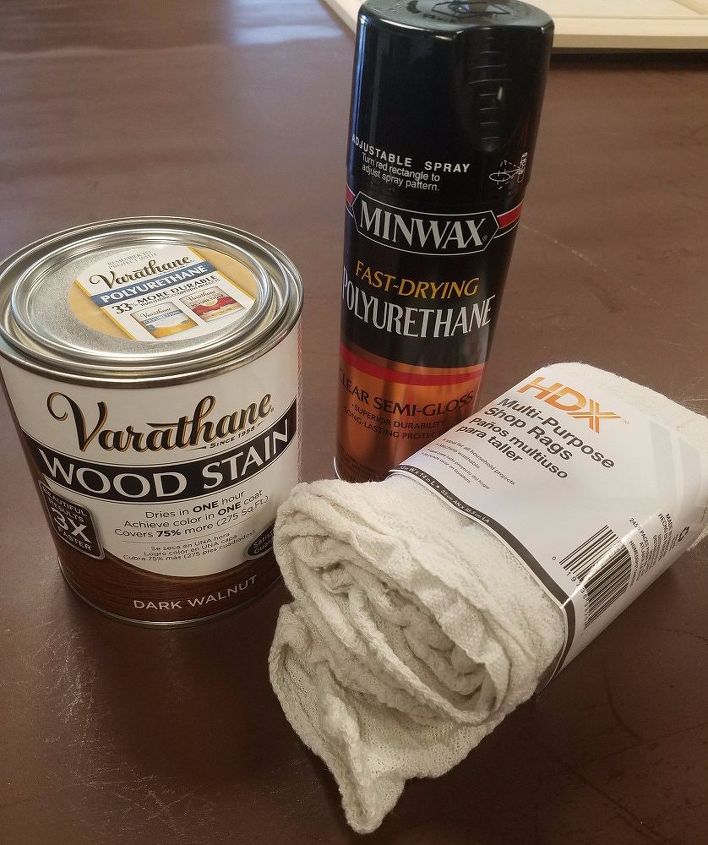
Staining Materials

  • Wood Stain

Choose a stain color that will match the rest of the cabinets in your kitchen.

  • Clear Polyurethane

This will protect your cabinets from water damage while adding a nice finished shine to your project.
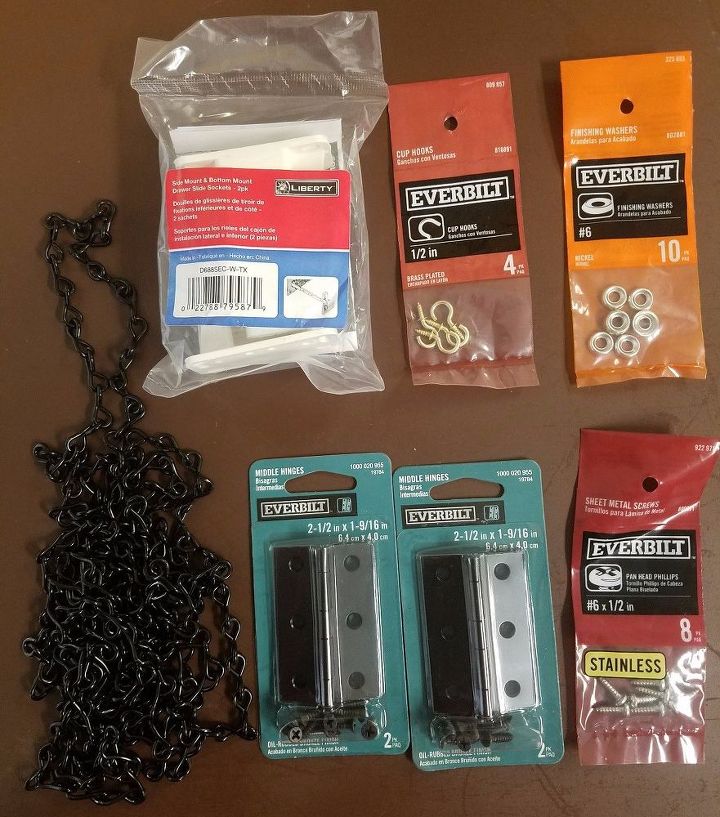
  • Multipurpose Rags
  • Gloves


Assembly Materials:

  • Double Bowl Vanity

15 inch depth

  • 2 Cabinet Doors

width: 19.5” height: 24.5”

  • 2 Drawer Boxes

width: 17.5” height: 4.25” depth: 13”

  • 2 Drawer Fronts

width: 19.5” height: 6”

  • Four Drawer Slide Sockets

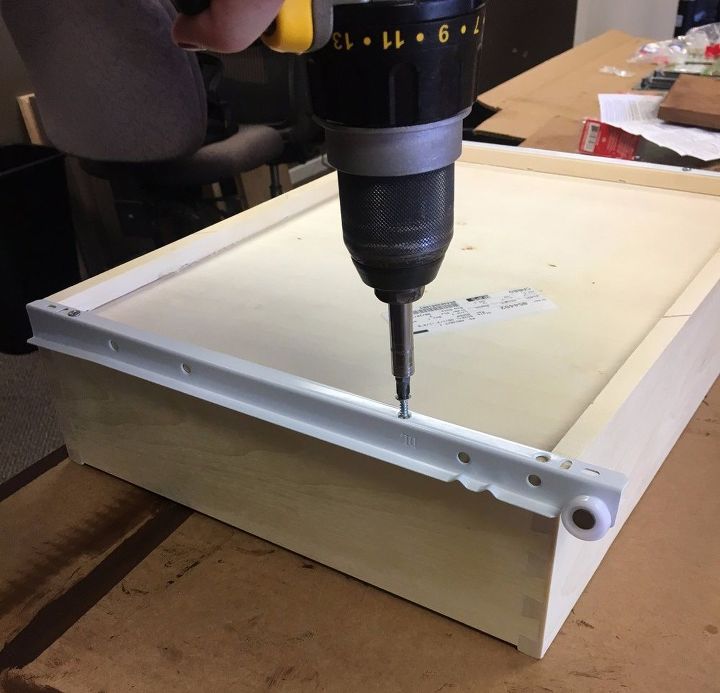
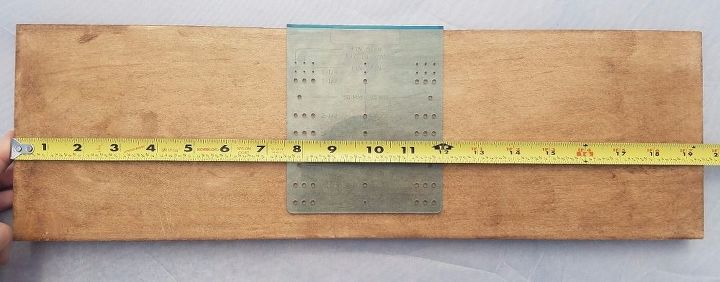
Slide Sockets keep the drawer slides and drawer box in place by fixing the drawer glides to the rear of the cabinet box.

  • Four Drawer Glides

Measure the depth of the cabinet box before purchasing the sliders to make sure they fit just right. For our project, we used 14” universal side mounted drawer glides

  • Two Trash Cans

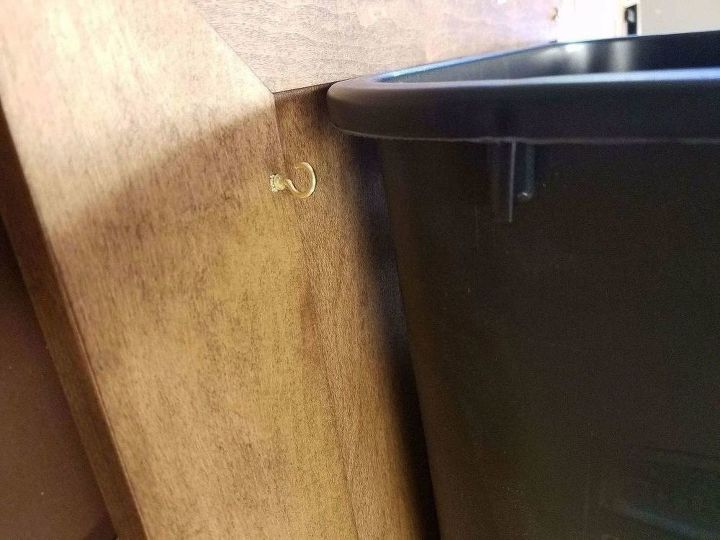
Be sure to measure the height of the trash cans to ensure they fit to the inside of the door and allow for the doors to swing open once attached. For our project, we used 2 10 ¼ gallon trash bins

  • 10 Feet of Chain

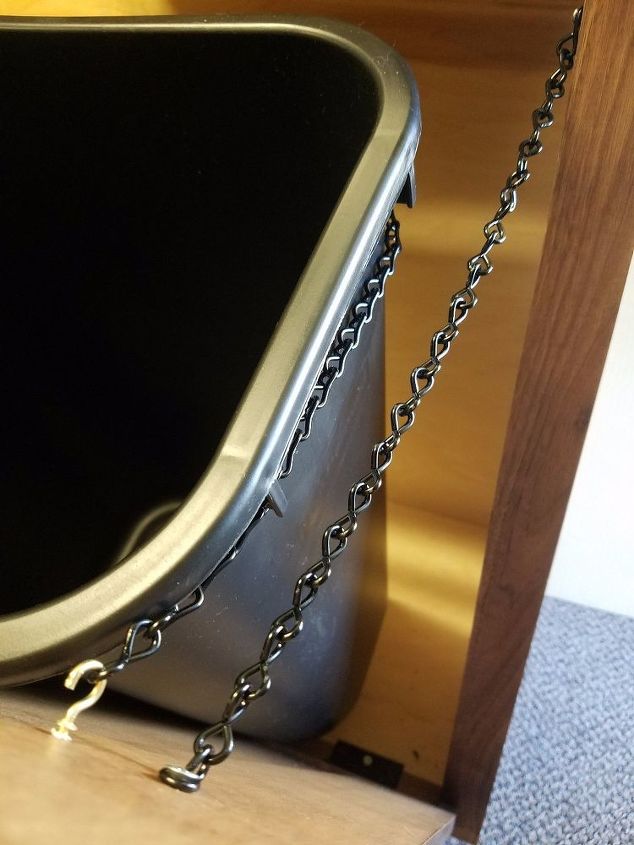
The chain will be cut into 6 pieces. Two pieces to secure the trash cans to the door and four pieces to secure the doors (two on each door) to the vanity.

  • 4 Middle Hinges

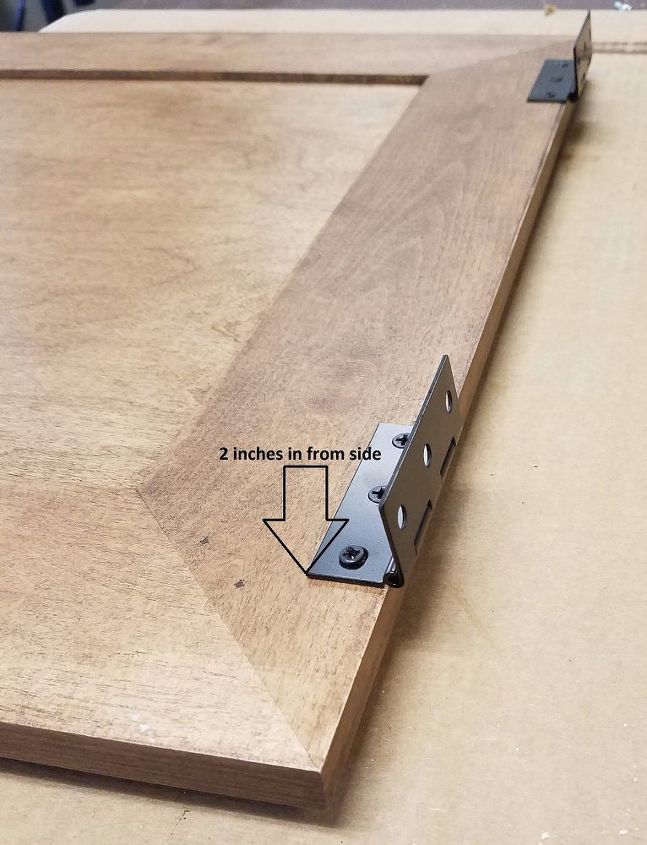
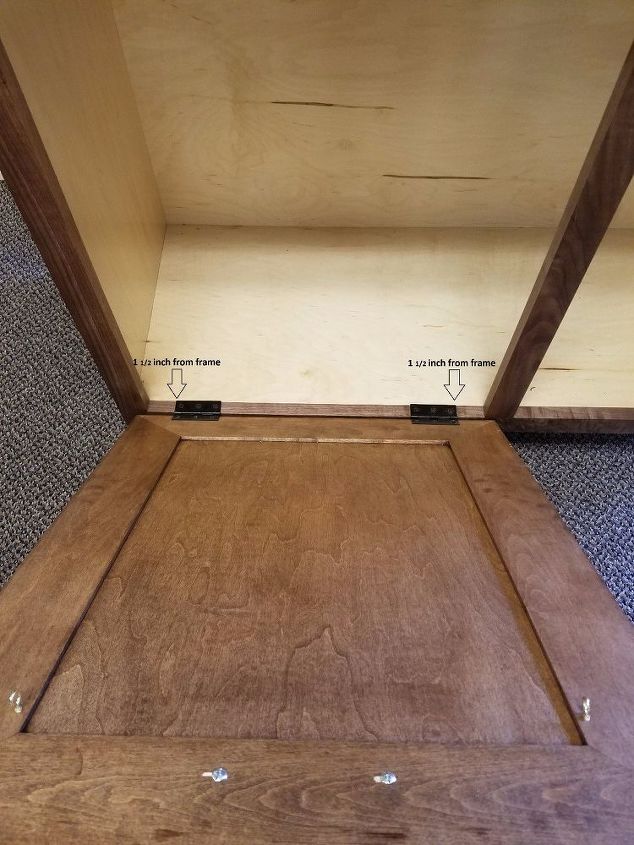
There will be two hinges placed at the bottom of each door to make for a smooth open and close.

  • 8 Sheet Metal Screws

These screws will be used to secure the chains to the doors and cabinet box.

  • 4 Cup Hooks

The use of hooks to chain down the garbage cans will make for easy trash removal.

  • 2 Door Handles & 2 Drawer Knobs

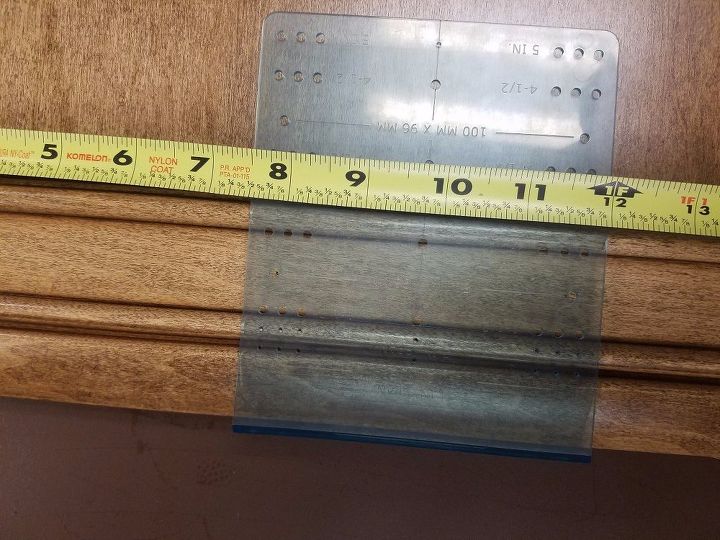
Try to get handles that fit your personality and compliment your kitchen!

  • 2 Door Magnets

The magnets will keep the doors from swinging open under the weight of the trash.

  • Optional Finishing Washers

These are optional and can be used to protect the wood when screwing the chains into the doors and cabinet box.

  • Tools

Screwdriver/cordless screwdriver and something to cut the chain with.

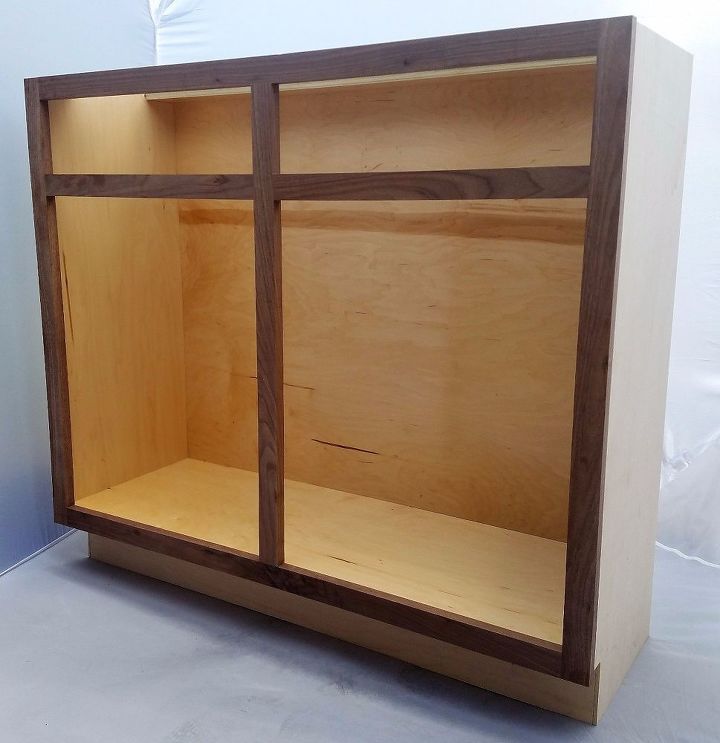
AssemblyCheck out this article on how to assemble your custom-made cabinet box from CabinetNow.com. http://www.cabinetnow.com/how-to/guides/how-to-assemble-vanity-boxes

Now that you have assembled your Double Bowl Vanity, it is time to turn it into your very own Secret Trash Bin. A lot of this project is customizable as you will want your trash bin to blend seamlessly with the rest of your kitchen cabinets.
Prepping your Work Station The first portion of this project involves stain and a polyurethane spray so be sure to set up your station in a well-ventilated area or outside. Both items can create quite a mess so be sure to lay down plenty of cardboard under and behind the vanity, drawer fronts, drawer boxes, and the cabinet doors. Always wear gloves and protective eye-wear when using stain to reduce the risk of injury.

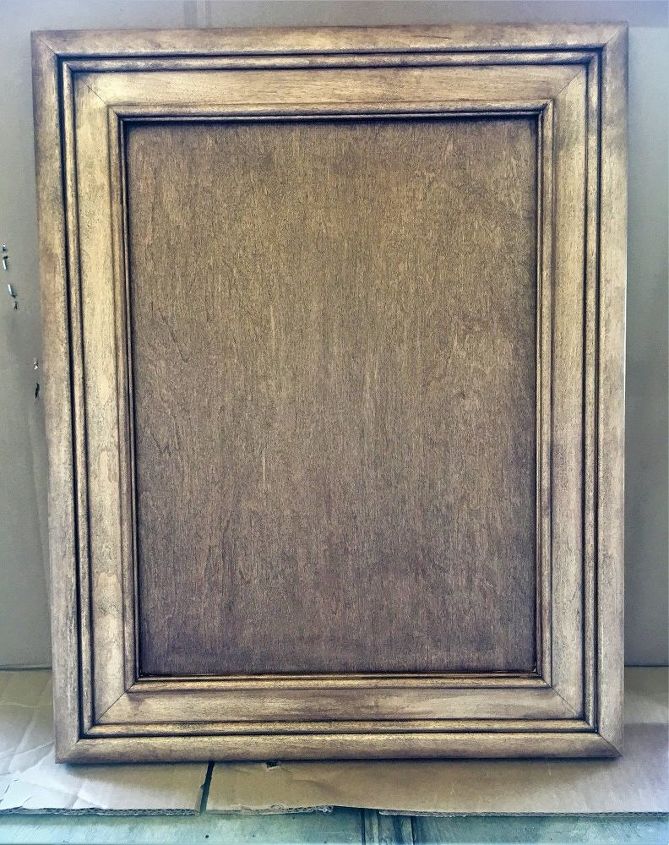
STEP 1: Staining your Vanity and Doors

  • Place the vanity, drawer fronts, and cabinet doors on a safe work surface. The easiest method is to open the cardboard box that the vanity came in and lay it flat on a work surface.
  • Begin staining by dabbing the rag into the stain can and, using long strokes, rub the stain into the wood. Wipe excess stain off and do not let the stain sit for too long on the wood to avoid uneven staining.
  • Once the vanity, drawer fronts, and cabinet doors are all stained and match in color, let them sit until dry.

STEP 2: Sealing your Vanity and Doors

  • Once the stain has dried, it is important to seal the entire vanity, drawer fronts, drawer boxes, and cabinet doors with polyurethane. This protects the wood from water damage and gives the entire project a glossy finished look.
  • Spray the Polyurethane gloss in long and even strokes to achieve the best finish. Be sure to wear protective gear when using the spray.

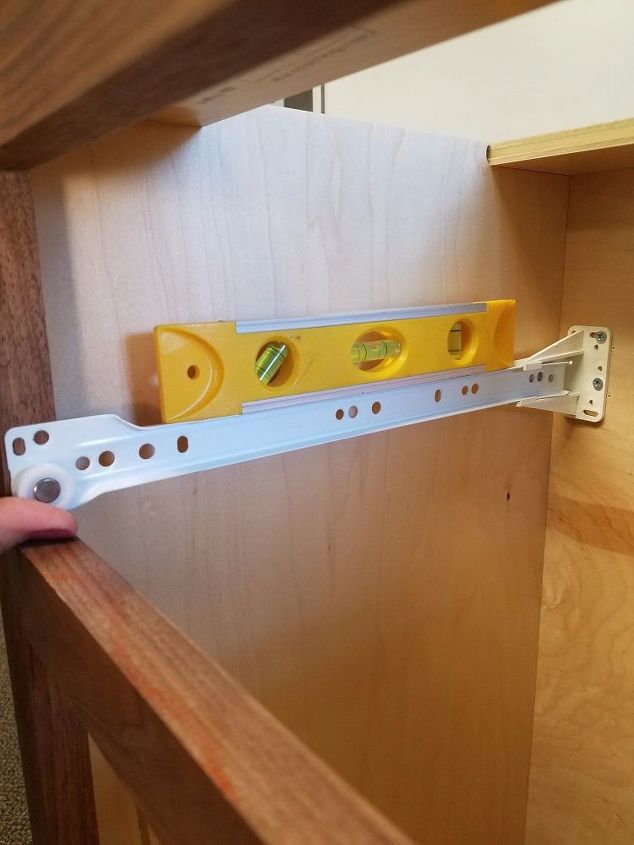
STEP 3: Fitting your Drawers

  • Take the glide sockets and position them on the back of the vanity where there are pre-notched holes for drilling. The sockets should be facing glide side in toward one another. Be sure to line up the glide sockets with the face frame of the vanity to ensure your drawers will lie evenly. Drill them into place with the screws included in the slide socket package.
  • Now that all four glide sockets (one for each side of the drawers) have been drilled into the back of the vanity, it is time to attach your drawer glides. Each glide is labeled with an R for right or an L for left. Fit the correct sides into the glides and make sure they are level before drilling them into the face frame of the vanity. As seen above.


  • Take the drawer glides that attach to the drawer and place the glide on the bottom of the drawer box, with the wheels on the glides facing the back of the box. The front of the glide should come within a couple of centimeters of the front, but not extending past the box, while leaving a couple of inches hanging off the back with the wheel. Drill these into place, one on each side of the drawer box.
  • Slide the drawer boxes into place in the vanity and make sure everything is level.

Do not attach drawer fronts until after Step 5 to measure overlay accordingly.

STEP 4: The Cabinet Doors

  • First, measure out the middle of your cabinet door, where you would like to place your door handle. Drill in holes according to where your handle will screw into place. As seen above.


  • Place the trash bin on the inside of the cabinet door just above the frame This will allow for the door to fully swing open. Screw in a cup hook on each side of the trash bin. As seen above. Now remove trash bins.


  • Attach your hinges on the back side of the bottom of the doors, with the hinge’s leaf sitting flush to the edge of the door and the hinge’s barrel sticking out. The hinges are placed at 2 inches in.

  • Hold one of the doors in place along the bottom of the face frame, where it is to be attached. Measure to make sure the hinges are sitting at 1 ½ inches from the side of the face frame. This will leave a half inch overlay on each side of the doors. Drill the hinges in place.


STEP 5: Adding the Trash Bins

  • Measure out how much chain will be needed to wrap around the garbage bins, we used 33 inches of chain here. Cut the chain into the appropriate length (one for each bin), hook it into the cup hooks and then slide your bins into place. This chain will secure your trash bins to the inside of the cabinet door.
  • Cut the remaining chain into four 12-inch-long pieces. These will be used to keep the doors from swinging out too far.
  • Use the sheet metal screws to screw one end of the 12 inch chain to the door, next to the hook, and the other end to the inside of the face frame. As seen above. Repeat on each side of trash bin.
  • Lastly, attach one door magnet underneath the drawer face frame facing outward. Line up the matching metal piece to the magnet and screw it into the door. This will prevent the cabinet doors from swinging open under the weight of the trash.


STEP 6: Add your Drawer Fronts

  • Adding the drawer fronts to the drawer boxes is a little bit different in this project than a typical installation would call for. Because the cabinet doors will be attached with a hinge at the bottom of the doors, to allow it to pull forward, there will not be an overlay at the base of the door. This raises the overlay for the top of the doors, which in turn raises the overlay for the drawer fronts to ensure everything closes properly. Measure accordingly so your drawer fronts do not interfere with the cabinet doors.
  • Once the drawer fronts are attached to the drawer box, measure the middle of each drawer and drill through both the drawer box and the drawer front. Fit the knob in place.


STEP 7: Enjoy your New Secret Trash BinsAfter installing the drawer boxes your secret trash bin will be nearly complete. To finish the project, pick out a counter top that will complement the rest of the room

DisclaimerWe have provided links to the exact product we used to achieve this beautiful finished project a the bottom of this article. The measurements used are for a basic height, double door cabinet but be sure to measure your kitchen before starting this project to make sure your trash can cabinets match the rest of your kitchen.
We also used Walnut wood to achieve this look. Price will vary by wood type and size of the cabinet box used. A single door Cabinet box would also look great and be as efficient.

contributed by Kasey at CabinetNow Check out Kasey’s site: http://www.cabinetnow.com/

More News from Alamogordo
I'm interested
I disagree with this
This is unverified
Spam
Offensive